This blog is the second of two which will cover using the Cloudera distribution. The first blog in this series was posted on February 7, 2017.
The target audience are companies with data that is on the cusp of the “big data” label (think the three V’s). We will be placing a larger emphasis on the pre-cluster setup from a freshly installed OS to being read to install Cloudera via Cloudera Manager. This is often overlooked and always leads to trouble from the get-go.
Introduction
In the past, I have worked with a few companies that were considering making the leap into the big data world. This can be quite daunting of a task; especially with the ever-changing Hadoop ecosystem.
In almost all these cases, it was beneficial to demo the available quick start tools that some of the major Hadoop distributions provide, namely Cloudera and Hortonworks. Even though the quick start tools take advantage of pseudo-Hadoop, they generally do not provide enough flexibility to scale out to prove more complex data scenarios. From an engineering standpoint, these types of demonstrations often provide little value in proving the feasibility of making the leap to Hadoop, but can however be used for individual learning.
Installing Cloudera
This is the second blog in the blog series, Using the Cloudera Distribution. In this blog, I will guide you through downloading and installing Cloudera via the Cloudera Manager installer. We will elect the primary services on the name node described in the first blog of this series titled Pre-Cloudera Setup / Architecture. We will continue by using the diagram from the first blog and then briefly show how to enter Cloudera Manager to add your data nodes.
First, follow these steps to begin the installation on your primary server or name node. It was denoted at hdpmst1 in the diagram.
- chmod +x cloudera-manager-installer.bin
- Start Cloudera Install: sudo ./cloudera-manager-installer.bin
- Once the installer starts, will you need to follow on-screen instructions and accept all user agreements.
- Once this is done, it will begin installing the latest Java JDK and Cloudera Manager. Should anything go wrong, the logs can be found at /var/logs/cloudera-manager-installer/.
- Navigate to http://your-server-name:7180 and use admin/admin to log in and continue service setup. The login will be admin/admin.
- You may be prompted to elect which Cloudera Manager type to use. You will see it defaults to Enterprise trial, but select the Express version when prompted.

Cloudera Hosts Install
Within Cloudera Manager (or CM):
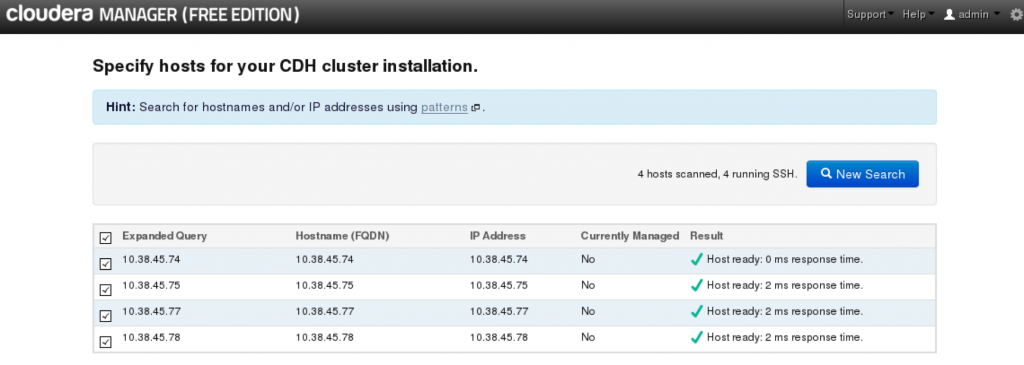
- Navigate to Hosts > All Hosts and click the Add New Hosts to Cluster Button.
- In the free-form text box, enter the names of the hosts for installation and click the Search. If configured properly, they should appear within the search results; check each one for install.
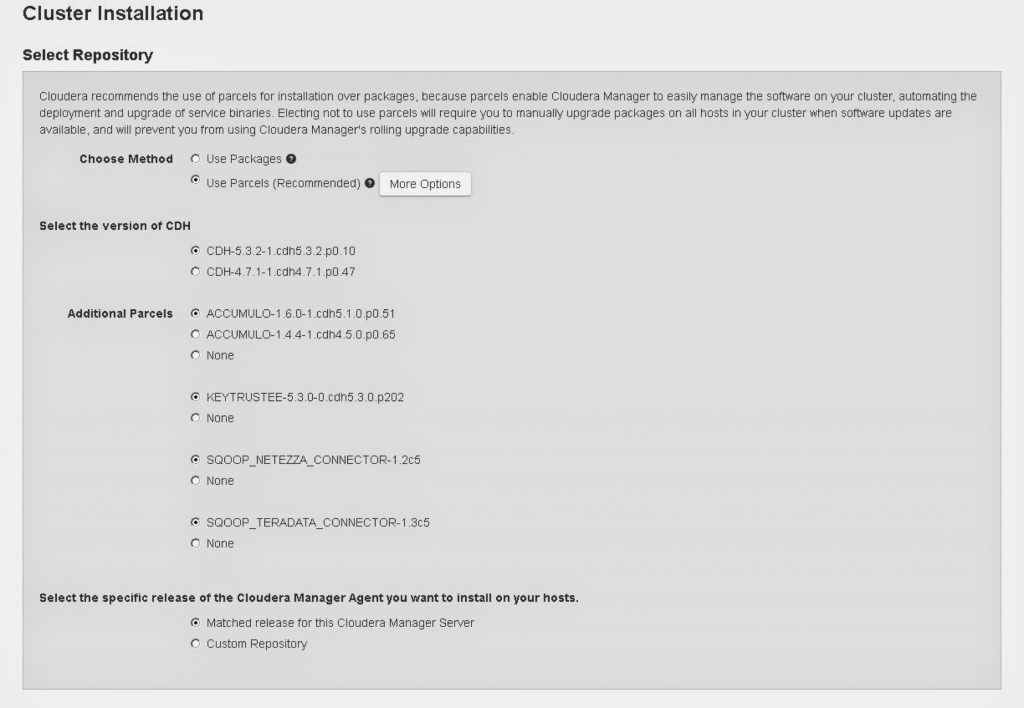
- On the next screen, you will be prompted to elect if you want to use Parcels or Packages. For this blog, we will choose packages (Parcels are recommended for actual cluster installs since it allows you to upgrade services within CM with minimal disruption, hence the default selections).
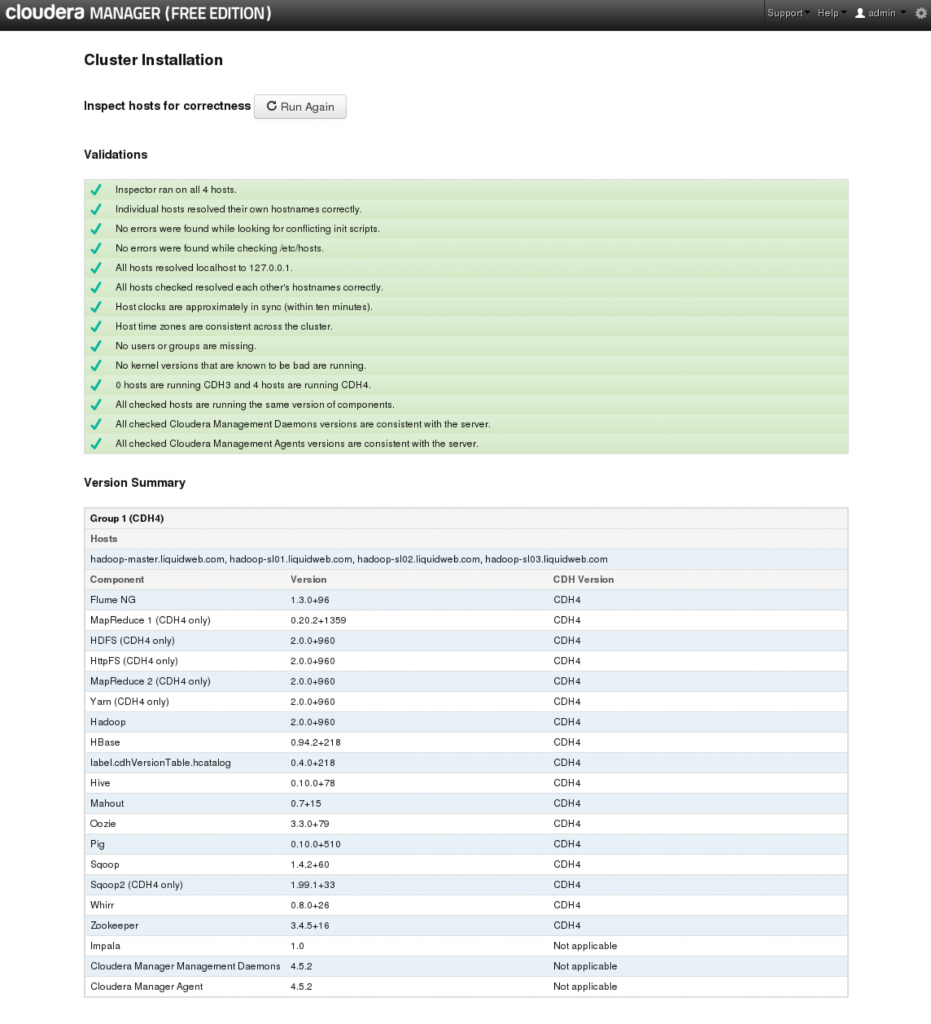
- Once the install starts, it will take a fair amount of time to complete (45 minutes +), so feel free to take a break, grab a coffee, and check back in a bit. Once completed you should get a screen like this:
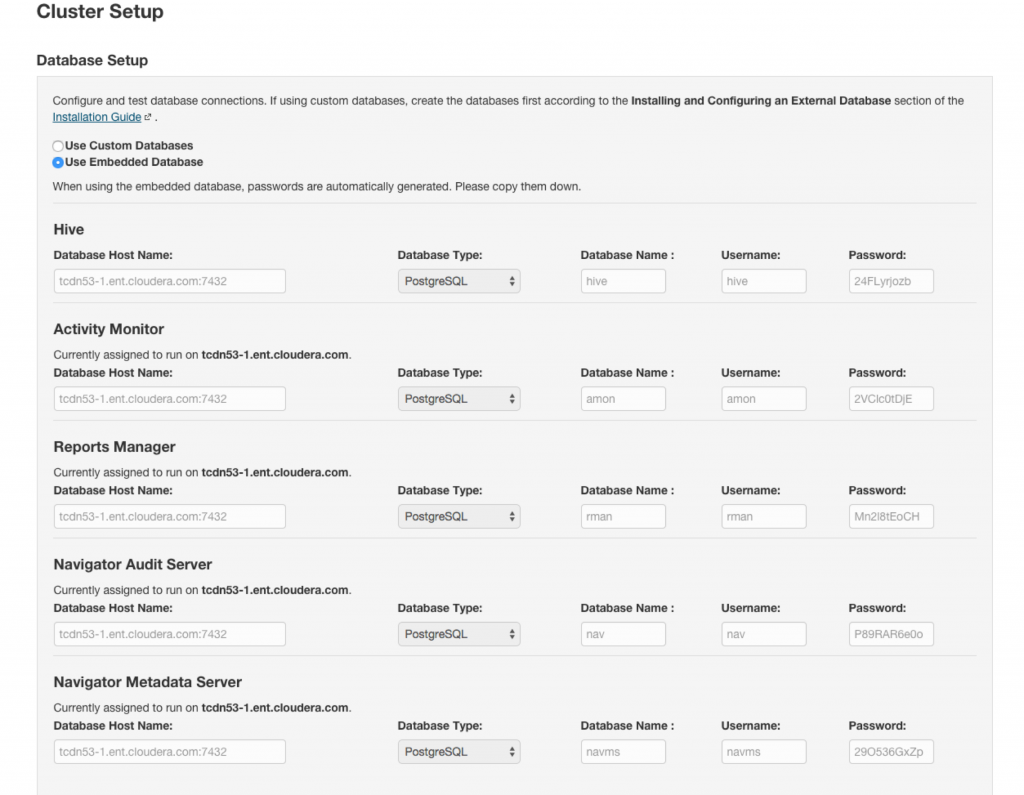
- Next you will be asked to pick what type of database installs to use (Embedded or Custom). We will use embedded so take note of the logins and passwords provided on the screen like the one pasted below. We elected to use PostgreSQL for these external databases.
Cloudera Services Install
Once you have successfully installed Cloudera on the hosts specified in the previous section, you will need to configure the external databases used as well as the services you will want to deploy. This is done through a series of screens like the hosts install. This makes it quite easy.
- First, you will be asked to pick what type of database installs to use (Embedded or Custom). We will use embedded so take note of the logins and passwords provided on the screen like the one pasted below. We elected to use PostgreSQL for these external databases.
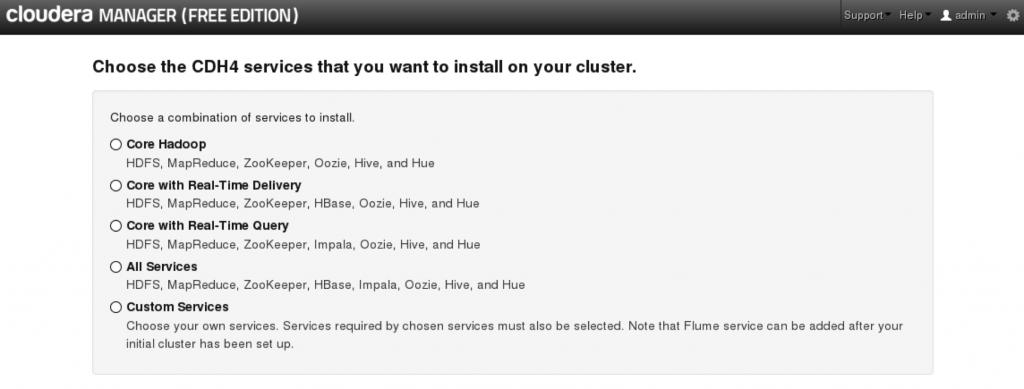
- Next, pick what type of Hadoop services to install. There are some default ones as shown here:
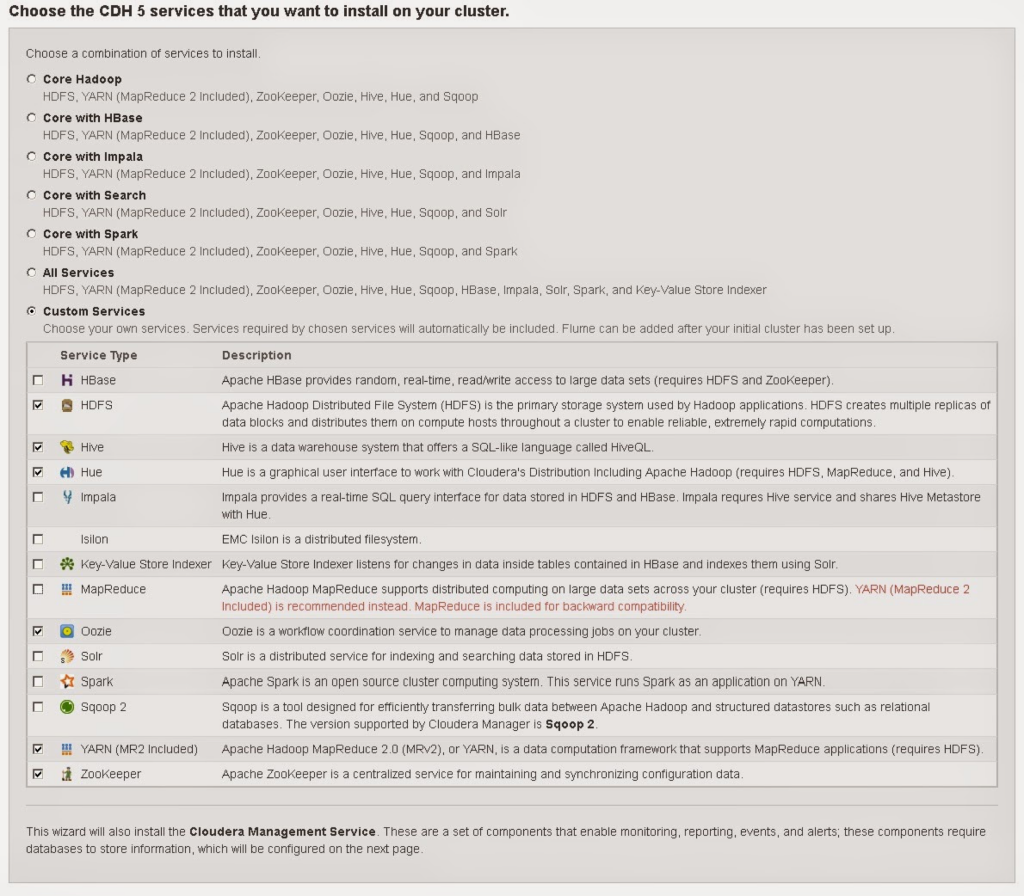
Since we are doing something a little more custom, let’s pick Custom Services and pick the following items shown below (you can add Impala later):
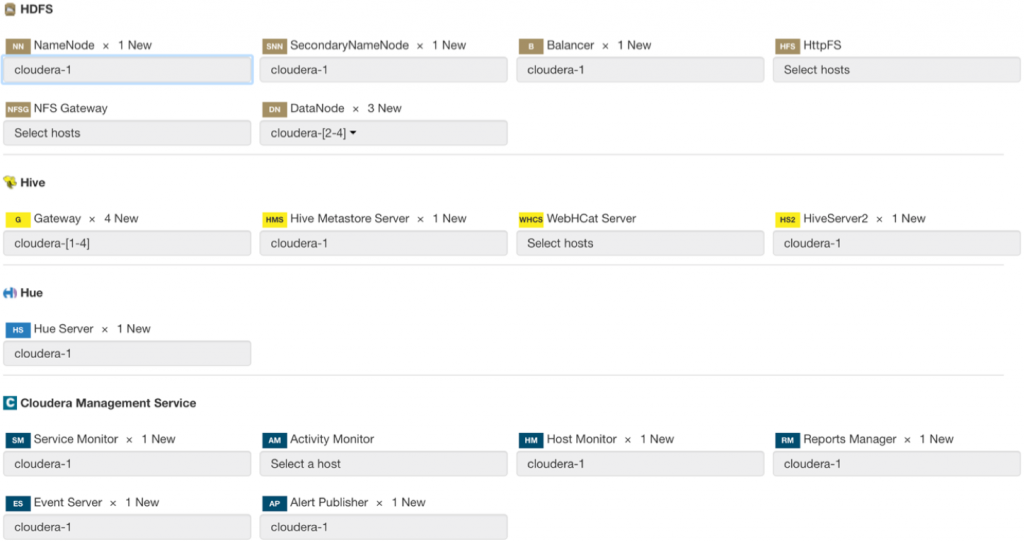
- Finally, we are asked to customize the selected role assignments for each of the hosts we performed the installs on (your machine names will differ than those shown below). You can use the diagram provided in the previous blog in this series to properly assign the roles selected.
Once you choose roles for your hosts, you are good to go!
Conclusion
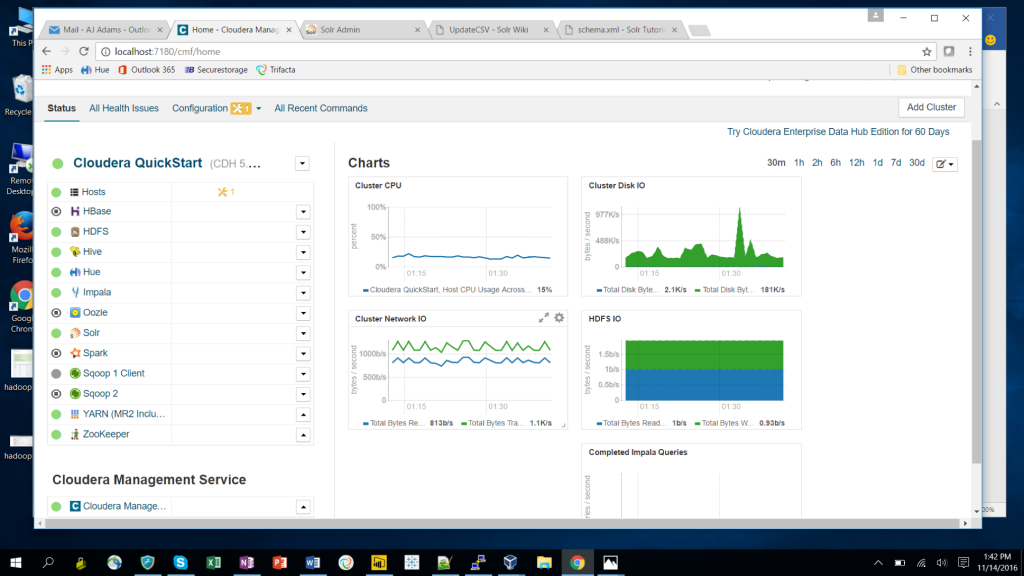
Now that you have set up your VM cluster, you should be able to connect and see all the hosts under the hosts section within Cloudera Manager. There will be some configuration that needs to be done to optimize some of the tools you’ll be using such as YARN, MR2, and Hive + Impala which is not covered here but there are decent articles on the Cloudera blog that describe these exercises.
Also, a separate blog is currently being written regarding Solr and will be geared towards getting a quick start with that tool.
Thank you for reading and any feedback is greatly appreciated, you can contact us directly or through our webpage at bardess.com.
Written by AJ Adams, Database Consultant, The Bardess Group Ltd.